safety 1st easy install walk-thru gate instructions
Safety 1st Easy Install Walk-Thru Gate: A Comprehensive Guide
Today‚ April 28th‚ 2026‚ this guide details the Safety 1st gate‚ lauded for excellent security and remarkably simple installation procedures for parents․
Understanding the Safety 1st Easy Install Walk-Thru Gate
The Safety 1st Easy Install Walk-Thru Gate is designed with parental convenience and‚ most importantly‚ child safety as its core principles․ This gate offers a blend of straightforward installation and robust security features‚ making it a popular choice for households with infants and toddlers․ It’s particularly noted for its ease of setup‚ allowing parents to quickly secure potentially hazardous areas like stairways or doorways․
Unlike some more complex gate systems‚ the Safety 1st gate prioritizes a user-friendly experience․ It can be installed using either pressure mounting – ideal for situations where drilling isn’t desired – or hardware mounting for increased stability‚ especially at the top of stairs․ The gate’s design incorporates a walk-thru feature‚ enabling easy passage for adults while maintaining a secure barrier for little ones․ Its excellent security rating confirms its reliability․
Key Features and Benefits
The Safety 1st Easy Install Walk-Thru Gate boasts several key features contributing to its popularity․ Its primary benefit is the simplified installation process‚ allowing for quick setup without specialized tools or extensive effort․ The walk-thru design is incredibly convenient‚ eliminating the need to climb over the gate repeatedly․
Security is paramount‚ and this gate excels in that area‚ earning high ratings for its robust construction and reliable locking mechanism․ The dual mounting options – pressure and hardware – provide flexibility to suit different environments and safety needs․ Parents appreciate the convenience of being able to easily set up the gate and the peace of mind knowing their child is protected․ It’s a practical solution for creating safer living spaces․
Gate Dimensions and Specifications
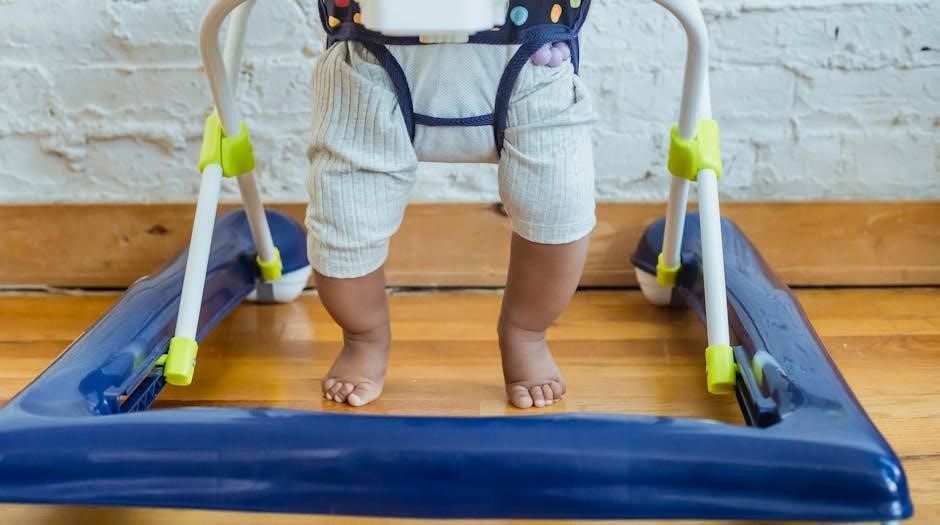
Understanding the Safety 1st Easy Install Walk-Thru Gate’s dimensions is crucial for ensuring a proper fit within your home․ While specific measurements can vary slightly between models‚ the gate typically accommodates openings ranging from 28 to 32 inches wide․ The gate itself generally stands approximately 29 inches tall‚ providing a sufficient barrier for most toddlers․
The width of the walk-thru opening is usually around 16-20 inches‚ allowing adults to easily pass through without fully opening the gate․ Mounting cup diameters are standard‚ designed for compatibility with common wall surfaces․ It’s important to verify your doorway or hallway width before purchasing to confirm compatibility․ Precise specifications are available on the product packaging and the Safety 1st website․

Installation Process: Preparation
Before beginning‚ carefully unpack all components and review the instructions; proper preparation ensures a secure and effective installation of your Safety 1st gate․
Tools Required for Installation
Successfully installing your Safety 1st Easy Install Walk-Thru Gate requires minimal tools‚ contributing to its user-friendly design․ For pressure mounting – the simpler method – typically‚ no tools are actually needed․ However‚ having a Phillips head screwdriver can be beneficial for tightening any adjustments․
If you opt for hardware mounting‚ which provides increased stability‚ you will require a Phillips head screwdriver․ A drill with a Phillips head bit can significantly speed up the process‚ especially if you’re working with harder wall materials․ A measuring tape is crucial for accurately determining the opening width and ensuring the gate fits correctly․
A pencil is helpful for marking the locations for hardware mounting cups․ Finally‚ while not essential‚ a level can ensure the gate is perfectly straight‚ contributing to its overall safety and functionality․ Always prioritize safety and consult the included instruction manual for specific recommendations․
Identifying Suitable Mounting Locations
Selecting appropriate mounting locations is paramount for the Safety 1st Easy Install Walk-Thru Gate’s stability and effectiveness․ Ideal locations are at the top or bottom of stairs‚ or doorways where a secure barrier is needed․ Walls must be structurally sound – drywall alone isn’t sufficient for hardware mounting; locate studs for secure attachment․
For pressure mounting‚ ensure the walls are flat and smooth to provide a firm grip for the mounting cups․ Avoid locations with baseboards or molding that could interfere with a secure fit․ Hardware mounting offers greater stability‚ but requires careful consideration of wall composition․
Avoid placing the gate near electrical outlets or cords․ The chosen location should allow for the gate to swing freely without obstruction․ Always double-check that the mounting points are within the gate’s specified width range for a safe and reliable installation․
Measuring the Opening
Accurate measurement of the opening is crucial for a secure Safety 1st Easy Install Walk-Thru Gate installation․ Begin by measuring the width of the opening at the top‚ middle‚ and bottom․ Use the narrowest measurement to ensure the gate fits snugly and securely․ The gate’s packaging will specify the maximum allowable width; exceeding this limit compromises safety․
Consider any baseboards or molding when measuring․ These obstructions reduce the usable width‚ so measure the clear opening without them․ For pressure-mounted gates‚ ensure sufficient wall depth exists to accommodate the mounting cups without interference․
Record your measurements carefully․ Double-checking prevents frustration and ensures you select the correct gate size or extension kits if needed․ Precise measurements are the foundation of a properly installed and effective safety gate․
Step-by-Step Installation Guide
This section provides clear‚ concise instructions for installing your Safety 1st gate‚ covering both pressure and hardware mounting options for optimal security․
Attaching Mounting Cups (Pressure Mounting)
Pressure mounting is a convenient‚ drill-free installation method suitable for doorways or openings where damage is a concern․ Begin by firmly pressing the mounting cups against the wall or doorframe‚ ensuring they are positioned directly opposite each other and at the appropriate height․

The gate’s design allows for adjustable cup placement‚ accommodating varying wall structures․ Listen for a distinct “click” sound‚ indicating the cups have securely locked into place․ It’s crucial to verify that the cups are evenly spaced and provide a stable base before proceeding․
Regularly check the pressure applied by the gate; it should be substantial enough to resist a firm push but not so strong as to cause damage to the surrounding surfaces․ Remember‚ pressure mounting is best suited for lighter-duty applications and may not be ideal for particularly active children or uneven surfaces․
Attaching Mounting Cups (Hardware Mounting)
For enhanced stability‚ especially with active children or uneven surfaces‚ hardware mounting is recommended․ This method requires drilling into the wall or doorframe․ Begin by marking the desired cup locations‚ ensuring they align perfectly opposite each other․
Using a drill bit appropriate for your wall type‚ carefully create pilot holes at the marked spots; Insert the provided wall anchors into the holes‚ then align the mounting cups over the anchors․ Securely fasten the cups using the included screws‚ tightening them firmly but avoiding over-tightening‚ which could strip the screw holes․
Double-check that all screws are tightened and the cups are flush against the wall․ Hardware mounting provides a significantly more robust and reliable installation‚ offering peace of mind knowing the gate is securely anchored and less prone to movement or dislodgement․
Installing the Gate Frame
With the mounting cups securely attached‚ carefully align the Safety 1st gate frame with the installed cups․ Gently slide the side rails of the gate into the corresponding slots within the mounting cups․ You should hear a distinct ‘click’ as the gate frame locks into place‚ indicating a secure connection․
Ensure the gate frame is level before proceeding․ If using the pressure mounting method‚ adjust the tension dial on the side rails to achieve a snug fit against the wall or doorframe․ For hardware mounting‚ verify that the frame is firmly seated within the cups and doesn’t exhibit any wobble․
A properly installed frame is crucial for the gate’s overall stability and functionality‚ providing a safe barrier for your child․ Take your time and double-check all connections before moving on to the next step․
Adjusting and Securing the Gate
Following installation‚ carefully adjust the gate’s height and rigorously test its stability‚ ensuring the locking mechanism operates smoothly and reliably for safety․
Adjusting Gate Height
The Safety 1st Easy Install Walk-Thru Gate often requires height adjustment to ensure a secure fit within the doorway or opening․ Begin by loosening the adjustment collar‚ typically located on one or both sides of the gate frame․ This collar allows for vertical movement‚ enabling you to raise or lower the gate as needed․
Carefully adjust the gate to the desired height‚ ensuring it’s high enough to prevent your child from climbing over‚ yet low enough for easy adult operation․ Once the appropriate height is achieved‚ firmly tighten the adjustment collar(s) to lock the gate in place․ Double-check that both sides are equally secured to prevent uneven pressure or instability․
It’s crucial to verify the gate remains stable after adjustment․ A properly adjusted gate should not wobble or easily move when pressure is applied․ Re-tighten the collars if any movement is detected․ Consistent height adjustment ensures continued safety as your child grows and develops new abilities․
Testing Gate Stability
After installation and height adjustment‚ rigorously testing the Safety 1st Easy Install Walk-Thru Gate’s stability is paramount․ Apply firm‚ consistent pressure to various points on the gate – the top‚ middle‚ and bottom – to simulate a child leaning or pushing against it․ The gate should remain firmly in place without any noticeable give or movement․
Check for any wobbling or shifting of the mounting hardware․ If any instability is detected‚ immediately re-tighten all screws and adjustment collars․ Ensure the mounting cups (whether pressure or hardware mounted) are securely attached to the wall or doorframe․ A stable gate is a safe gate‚ preventing accidental openings or collapses․
Regularly repeat this stability test‚ especially after any adjustments or if the gate experiences significant use․ Prioritizing stability ensures continued protection for your child and peace of mind for you․

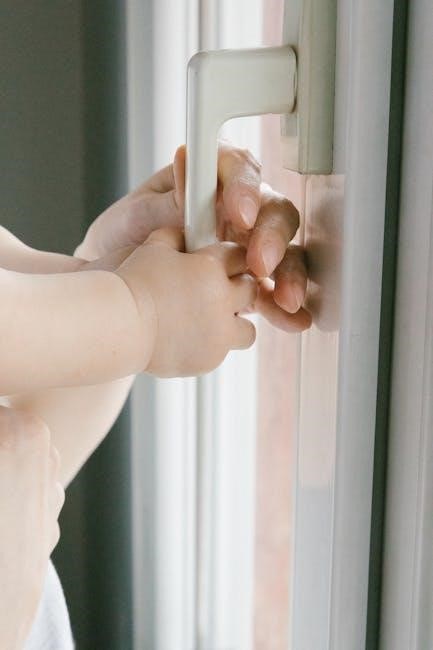
Locking Mechanism Functionality
A crucial step in verifying the Safety 1st Easy Install Walk-Thru Gate’s safety is thoroughly testing its locking mechanism․ Operate the latch multiple times‚ ensuring it engages and disengages smoothly and securely․ Confirm the latch requires deliberate action to open‚ preventing accidental release by a child․
Attempt to lift the gate while the latch is engaged; it should remain firmly locked․ Observe if the locking mechanism feels robust and reliable‚ without any signs of looseness or fragility․ The gate’s convenience relies on a functional latch‚ but safety is the priority․
Periodically check the latch for wear and tear‚ and ensure it continues to operate flawlessly․ A properly functioning locking mechanism is essential for maintaining a secure barrier and protecting your little one․
Safety Checks and Maintenance
Regular inspections are vital for continued safety; check hardware‚ look for damage‚ and clean the gate routinely to ensure optimal performance and security․
Regularly Inspecting Mounting Hardware
Consistent checks of the mounting hardware are absolutely crucial for maintaining the Safety 1st Easy Install Walk-Thru Gate’s effectiveness․ At least monthly‚ and more frequently with active use‚ carefully examine all screws‚ bolts‚ and mounting cups․ Ensure they remain tightly secured and haven’t loosened over time due to normal wear and tear or a child’s attempts to manipulate them․
Pay close attention to the points where the mounting cups connect to both the gate and the wall or doorway frame․ Look for any signs of stripping‚ cracking‚ or deformation in the plastic components․ If any hardware appears damaged or compromised in any way‚ immediately replace it with manufacturer-approved replacement parts․ Do not attempt to repair damaged hardware‚ as this could compromise the gate’s structural integrity and create a safety hazard․ A secure installation is paramount for child safety․
Checking for Gate Damage
Routine visual inspections of the gate itself are essential alongside hardware checks․ Regularly examine the gate frame‚ particularly the hinges and locking mechanism‚ for any signs of stress‚ cracks‚ or bending․ Carefully inspect the plastic components for fractures or breaks‚ especially around areas subject to frequent handling or pressure․
Pay close attention to the gate’s latching system‚ ensuring it operates smoothly and securely․ Verify that the locking mechanism engages fully and isn’t easily bypassed․ If any damage is detected – even seemingly minor – discontinue use of the gate immediately․ A compromised gate offers reduced protection and could fail during use․ Replace the entire gate if damage is significant‚ prioritizing your child’s safety above all else․ Consistent monitoring prevents potential hazards․
Cleaning and Care Instructions
Maintaining a clean gate contributes to its longevity and hygienic use․ Regularly wipe down all surfaces – the frame‚ bars‚ and locking mechanism – with a damp cloth and mild soap solution․ Avoid abrasive cleaners‚ as these can scratch or damage the plastic components․ For stubborn stains or sticky residue‚ a gentle all-purpose cleaner can be used sparingly‚ followed by a thorough rinse with clean water․
Ensure the gate is completely dry before resuming use․ Do not submerge the gate in water or use a pressure washer for cleaning․ Periodically check the mounting hardware for corrosion or debris‚ cleaning as needed․ Proper cleaning not only keeps the gate looking its best but also helps prevent the buildup of germs and bacteria‚ ensuring a safe environment for your child․
Troubleshooting Common Issues
Addressing potential problems like latching difficulties‚ wobbliness‚ or insecure mounting cups ensures continued safety and proper function of the Safety 1st gate․
Gate Won’t Latch
If the Safety 1st gate fails to latch properly‚ several factors could be at play requiring immediate attention․ First‚ carefully inspect the latch mechanism itself for any visible obstructions‚ such as small toys or debris‚ preventing full engagement․ Ensure the gate is fully closed; sometimes‚ a slight misalignment prevents the latch from connecting securely․
Next‚ examine the alignment of the gate frame with the mounting cups․ If the gate has shifted‚ even slightly‚ it can disrupt the latching process․ Gently adjust the gate within the opening‚ ensuring it’s square and level․ Check that the latch components on both the gate and the receiving side are free of damage or wear․ A worn latch may require replacement․

Finally‚ confirm that the locking mechanism (if applicable) isn’t engaged accidentally‚ blocking the latch․ A thorough visual inspection and gentle manipulation of the latch components should resolve most latching issues‚ maintaining a secure barrier․
Gate is Wobbly
A wobbly Safety 1st gate compromises its safety and stability‚ demanding prompt investigation and correction․ Begin by meticulously checking all mounting hardware – screws‚ bolts‚ or pressure cups – to ensure they are tightened securely․ For pressure-mounted gates‚ verify the rubber pads are intact and providing sufficient grip on both surfaces;
If using hardware mounting‚ confirm all screws are firmly anchored into the wall studs․ Loose screws are the most common cause of wobbling․ Inspect the gate frame itself for any signs of bending or damage․ A damaged frame may necessitate replacement․ Ensure the gate is installed on a level surface; uneven floors can contribute to instability․
Finally‚ re-evaluate the mounting locations․ If the wall or doorframe is inherently unstable‚ consider relocating the gate to a more solid structure for enhanced safety and reduced wobble․
Mounting Cups Not Secure
If the Safety 1st gate’s mounting cups aren’t holding firmly‚ the gate’s stability is severely compromised‚ posing a safety risk․ First‚ ensure the surfaces where the cups are placed are clean‚ dry‚ and free of any debris or coatings that might reduce adhesion․ Check the rubber pads on the inside of the cups; these provide crucial grip and should be in good condition․
Apply firm‚ even pressure when attaching the cups‚ ensuring they are fully engaged with the surface․ For textured walls‚ consider using the included wall adapters (if provided) to enhance grip․ If the problem persists‚ hardware mounting is strongly recommended for a more secure installation․
Avoid excessive force‚ as this could damage the cups or the surrounding wall․ Regularly inspect the cups for cracks or wear‚ replacing them if necessary to maintain optimal security․